

Deploying your website
Using a version of DX8 prior to version 5.4.0, you can only import/export using DX8 sync if both the original site and destination site are using the same version of DX8.
Versions prior to 5.4.0, exports from DX8 Sync could only be imported to sites with the same version of DX8 that they were exported from. For example, if you exported a package using DX8 Sync from a site running DX8 version 5.2, you could not import to a site running DX8 5.3.
An automatic entity update tracking system is in place, so from DX8 version 5.4.0 onwards, you will be able to export from sites running older versions of DX8 (starting with 5.4.0) into sites running later versions.
Install DX8 sync
Install the DX8 sync module, you can do this through the UI by navigating to: /admin/modules or running the following drush command in your terminal:
drush pm-enable cohesion_sync -y
Deployment steps (UI):
For a guide to using DX8 sync through the UI, see Package export and import.
Deployment steps (Drush):
DX8 Sync allows you to export all of your DX8 configuration including styles, templates and components along with all file entity asset dependencies as a single package. You export this package to the sync directory and commit to your repository for later deployment in a similar way to performing a core config export/import.
It is designed to be used alongside core config export/import. A typical workflow would involve using core config export/import to move all configuration except for DX8 entities and using DX8 sync to move the rest.
Configuring your sync directory
This is the location of your site configuration files.
In settings.php you will need to enable the block of code as shown below. If you're using Drupal core config import/export, you will need to add CONFIG_SYNC_DIRECTORY => '/directory/outside/webroot', as an entry to the $config_directories array below.
Example:
 $config_directories = [
    'dx8_sync' => 'sites/default/files',
  ];
It's possible to set the dx8_sync directory to the sync directory as core (which is /sync by default) or you could export to the filesystem in sites/default/files for example.
Configuring entity types to include in the export
With DX8 and the DX8 sync modules installed, navigate to: /admin/config/development/sync/export_settings from here you can select which entity types will be scanned for the export.
Exporting configuration
To export all DX8 packages and dependencies to your sync directory, use the following drush command:
drush sync:export
This will create a file called: [your-site--name].package.yml_ in your sync directory. The file has an underscore after the file extension so that Drupal core config import/export doesn't detect and process it.
To export your DX8 configuration using a custom filename, use the following drush command:
drush sync:export --filename-prefix=myfilenamehere
This will create a file called: myfilenamehere.package.yml_ in your sync directory.
Importing configuration
To import all previously exported *.package.yml_ files from your sync directory into the current site, use the following drush command:
drush sync:import
Note that you will need to use one of the following options to tell Drupal what to do when it finds differences between the entities in the *.package.yml_ files and your site.
drush sync:import --overwrite-all
drush sync:import --keep-all
While the import is running, your site will be placed into maintenance mode.
Deploying a specific package via drush by specifying a path
To deploy a specific *.package.yml file via drush, you can specify a local or remote file path like this:
drush sync:import --path=/path/to/local.package.yml

drush sync:import --path=http://domain.com/remote.package.yml
DX8 Sync will detect if the path you provided is a local or remote file and handle streaming automatically. You can also use the --overwrite-all and --keep-all options when specifying a path.
Deploying a list of packages on module install
Module developers can export DX8 Sync packages and include as part of their module. When set up correctly, the packages will automatically be deploy when the module is enabled.
To set this up, create a new Yaml reference file inside your module:
config/dx8/packages.yml
This file should only contain a simple array which references paths to local or remote files. For example:
# This is my package reference file.

- config/dx8/my.package.yml
- http://mydomain.com/my.package.yml
Note that when including local files, the path should be relative to the module root directory.
Configuration deployment approach
Exporting Drupal configuration can be done using the drush command drush cex. This would export all your website configuration into your sync directory including DX8 configuration, this wouldn't include any file/image assets used within DX8. Using DX8 sync to export DX8 configuration, makes sure all file/image assets are also exported.
You could export all configuration and then import all your website configuration and then DX8 configuration over the top using DX8 sync as it will bring dependencies with it. This approach works though is not ideal.
Using a module such as configuration split you can then split out specific configuration by Drupal module.
For example, you could create a 'split' which includes all configuration except DX8, as you would then use DX8 sync to export DX8 configuration including any file/image asset used.
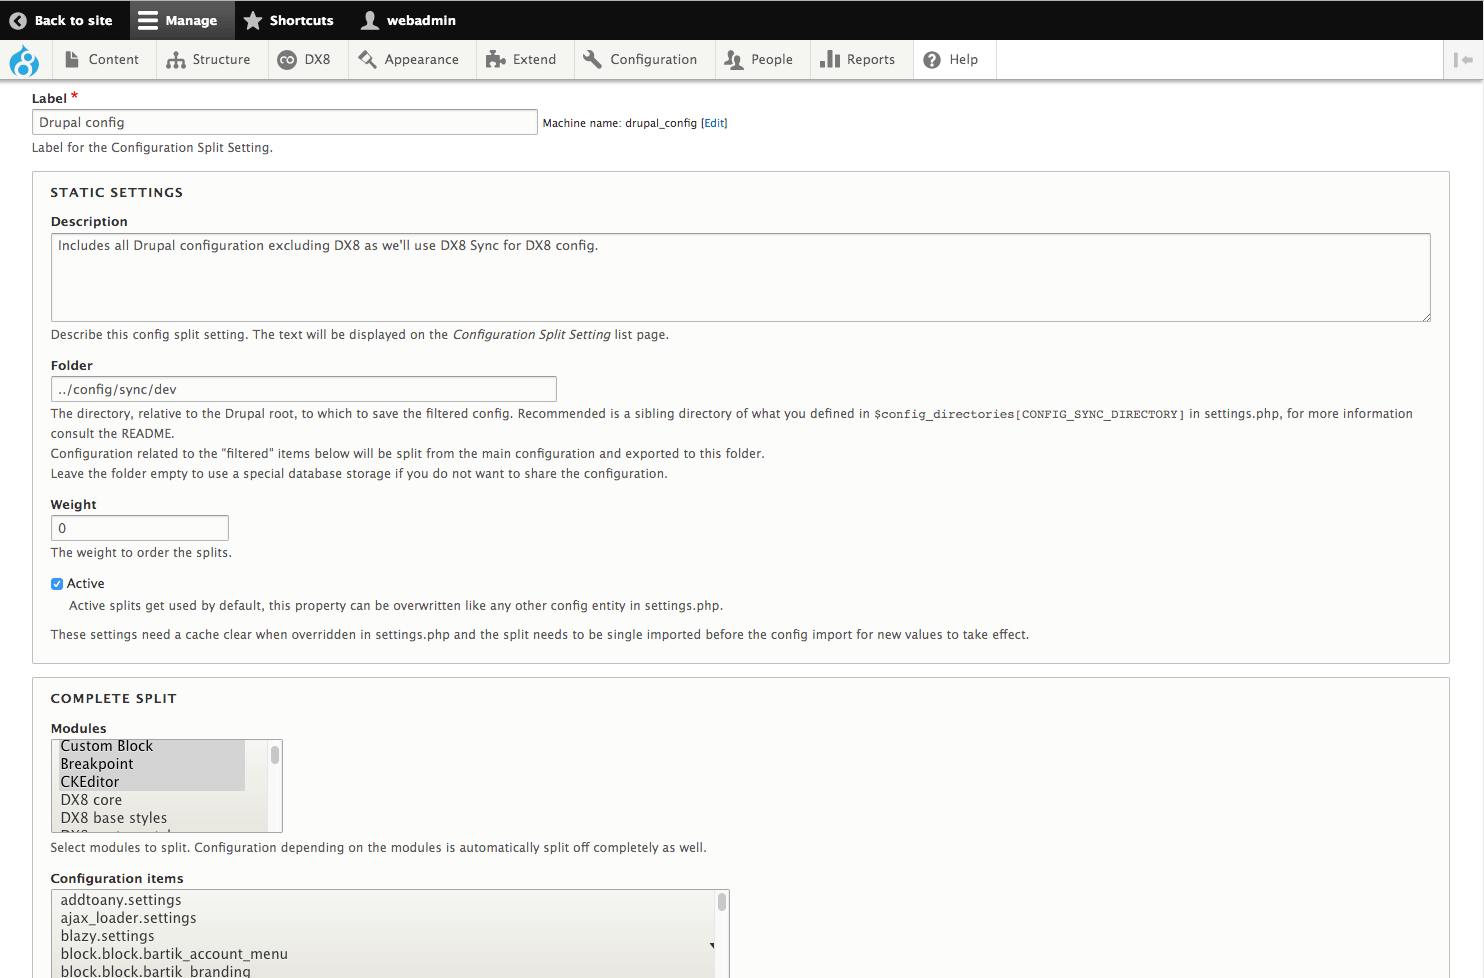
Find out more about configuration split module on their online documentation.