

Add on-click interactivity to elements
You can apply on-click actions to a link which will toggle, add or remove a modifier class on an element. This can be applied to itself (same element) or a different element on the Layout canvas. This allows you to change the appearance of an Element on the Layout canvas when a user clicks on a link.
For example: the Link below applies a Modifier class to the Paragraph which changes its background color. Click the link below to see this working.
Click meLorem ipsum dolor sit amet, consectetur adipiscing elit, sed do eiusmod tempor incididunt ut labore et dolore magna aliqua. Ut enim ad minim veniam, quis nostrud exercitation ullamco laboris nisi ut aliquip ex ea commodo consequat. Duis aute irure dolor in reprehenderit in voluptate velit esse cillum dolore eu fugiat nulla pariatur. Excepteur sint occaecat cupidatat non proident, sunt in culpa qui officia deserunt mollit anim id est laborum.
Adding a 'toggle modifier class' action to a link
As an example, the following steps illustrate how to create the working demo above.
Step 1 - Add an element with a modifier class
- Add a Paragraph element to the Layout canvas
- Double click on the Element to edit its settings
- Add some dummy text into the Paragraph text field
- Click on the Styles tab
- Click on the Selector tree button (Default) to open the Selector tree
- Click on the +icon and select Modifier in the menu
- Add a Modifier class, for this example, add .bg-color and click Add
- Click on the Modifier (.bg-color) in the Selector tree
- The tree will close and the Selector tree button will display the name of your Modifier .bg-color
- Click on the Properties button and click Background > background color to add the background color property to your Style form.
- Click on the color swatch and choose a color
- Now click on the ...ellipsis tab and click on Markup
- In the Classes field, add a class my-paragraph
- Click the Apply button to apply the above settings and styles to your Paragraph element.

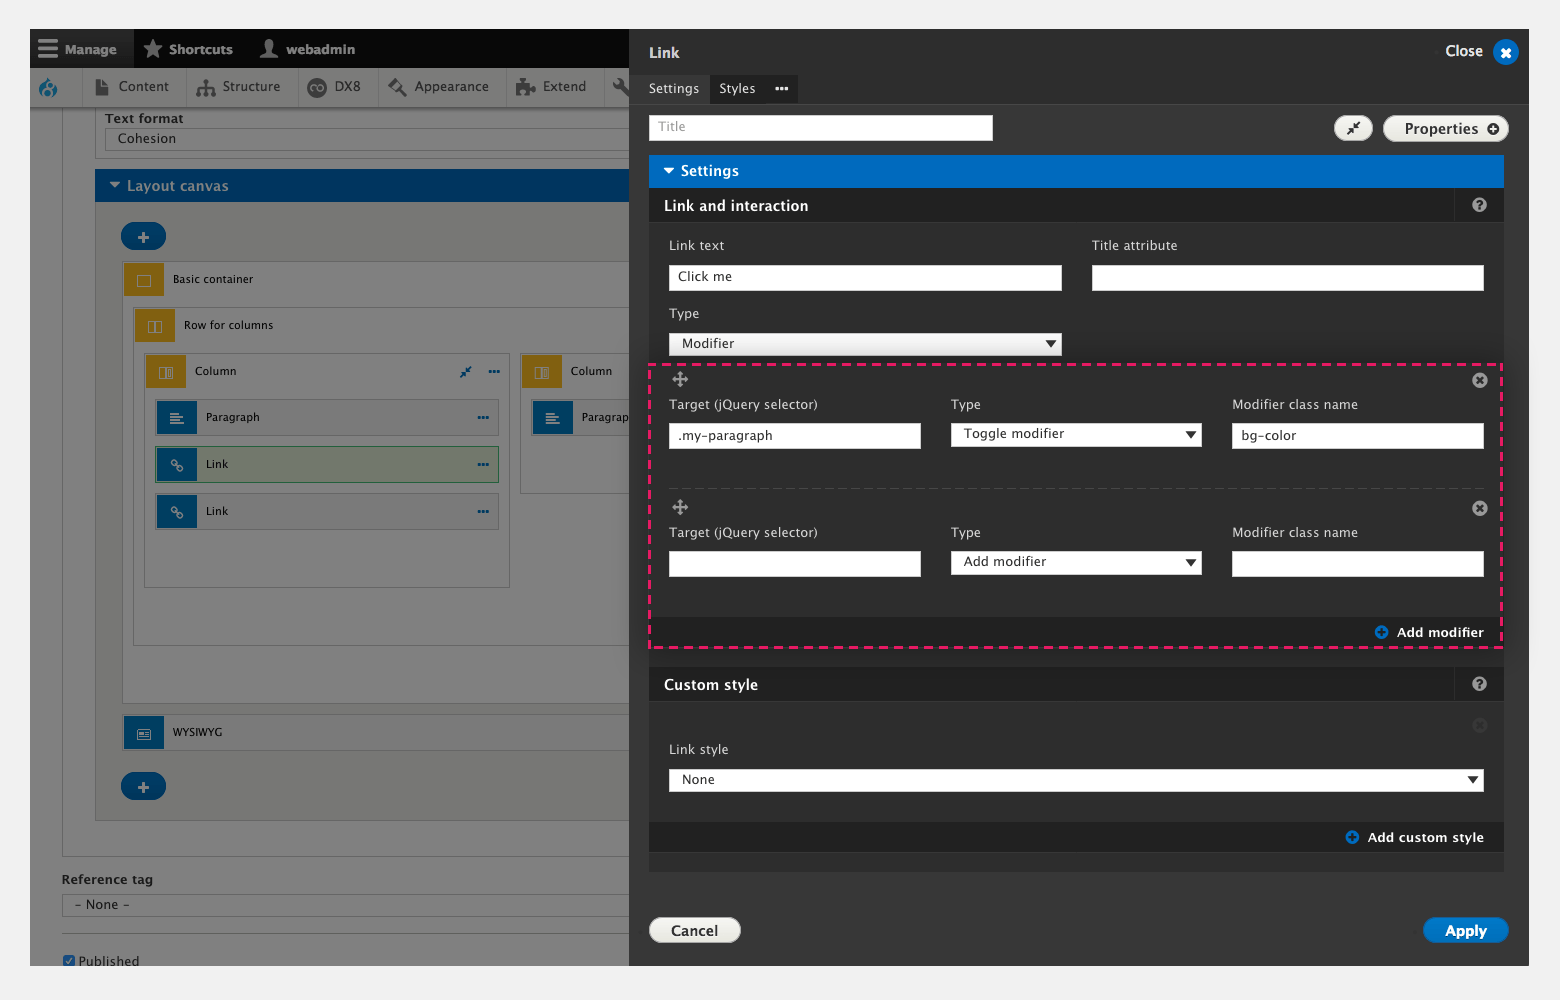
Step 2 - Add a link element with toggle modifier action
- Add a Link element to your layout canvas
- Double click on the Link element to edit its settings
- Enter "click me" in the Link text field
- Select Modifier in the Type field
- Enter .my-paragraph in the Target (jQuery selector) field
- Select Toggle modifier in the Type field
- Enter bg-color in the Modifier class name field
- Click Apply to apply these settings to the Link element
When adding a class to the Target field it must contain the "." before the class name. For example .my-paragraph.
Step 3 - Save your page and preview your interactive link
- Click Save
- Preview your page
- You should see a link "Click me" and a paragraph on your page
- Click on the link and the background color of the paragraph should change to what you selected when creating your Modifier class.
Targeting multiple elements
You can target multiple elements using a jQuery selector and apply a Modifier class to them. To target multiple elements add multiple classes separated by a comma. For example .class1,.class2 would select elements with either of these classes.
You can also target base elements using jQuery selectors. For example, body,.class1 would select the body element and an element with class1.
For a useful list of jQuery selectors, see https://www.w3schools.com/jquery/jquery_ref_selectors.asp
Applying multiple modifiers
You can apply multiple modifiers to multiple elements at the same time. This will allow you to change the appearance of multiple elements when a user clicks on a link.
To apply multiple modifiers:
- Click Add modifier underneath the current modifier fields
- This will add another row of fields
- Enter a new selector in the Target field
- Select the type in the Type field
- Add a modifier class in the Modifier class name field
- Click Apply to apply your changes.
Applying CSS transitions
You can apply CSS transitions to an element so it animates smoothly from its default appearance to its appearance when a modifier is applied.
To ensure the transition only applies when the modifier is applied and not in other situations, for example when the browser is resized or the page first loads, DX8 includes a specific transition class coh-transition. This class is added when a modifier is applied at the start of a transition and then removed at the end of a transition.
To ensure a consistent transition works consistently when modifiers are applied:
- Add a modifier class .coh-transition to the element that is going to be transitioned
- Click on the modifier to add CSS properties to it
- Click on the Properties > Transform and transition > Transitions
- Add your transitions to the form. These will be applied to the .coh-transition modifier
- Click Apply.