

Using DX8 with AMP
AMP (Accelerated Mobile Pages), are a stripped down form of HTML designed to be lightweight and serve mobile content much faster than regular pages. Search engines favour AMP pages when searching on a mobile device, as these pages load quicker than the full site.
Many of our DX8 elements are compatible with AMP, the following elements are currently not compatible with AMP at this time:
Youtube video background
Slide and Slider container
Accordion and tab container
Accordion and tabs item
Google Map
Map Pin
Picture - this is due to AMP not currently converting <picture> tags
All other elements are compatible with AMP and if you use any of those compatible elements in a component or component content they are also compatible.
Also note that once the below steps have been completed as per recommendation, no DX8 styles or templates will be used when using the AMP theme.
Below is a step by step guide of how to setup AMP with DX8.
Step 1 - Install AMP and AMP theme
Install version 8.x-2.1 of the Accelerated Mobile Pages (AMP) module and version 8.x-1.1 of the AMP theme.
We recommend using composer as it will install all dependencies and libraries needed, run the following composer commands to install the module and theme at the correct version.
composer require 'drupal/amp:2.1'
composer require 'drupal/amptheme:1.1'
AMP installs a newer, incompatible version of the Masterminds HTML5 library, so version 2.3.0 of this should be installed:
composer require masterminds/html5:~2.3.0
Once both the module and theme are downloaded, enable either through the UI or using drush.
Step 2 - Set DX8 enabled theme
DX8 has a system setting called DX8 enabled theme, this allows a site builder to restrict which Drupal theme DX8 should be applying styles and templates too. This means that when viewing your AMP theme, no DX8 templates or styles will be applied.
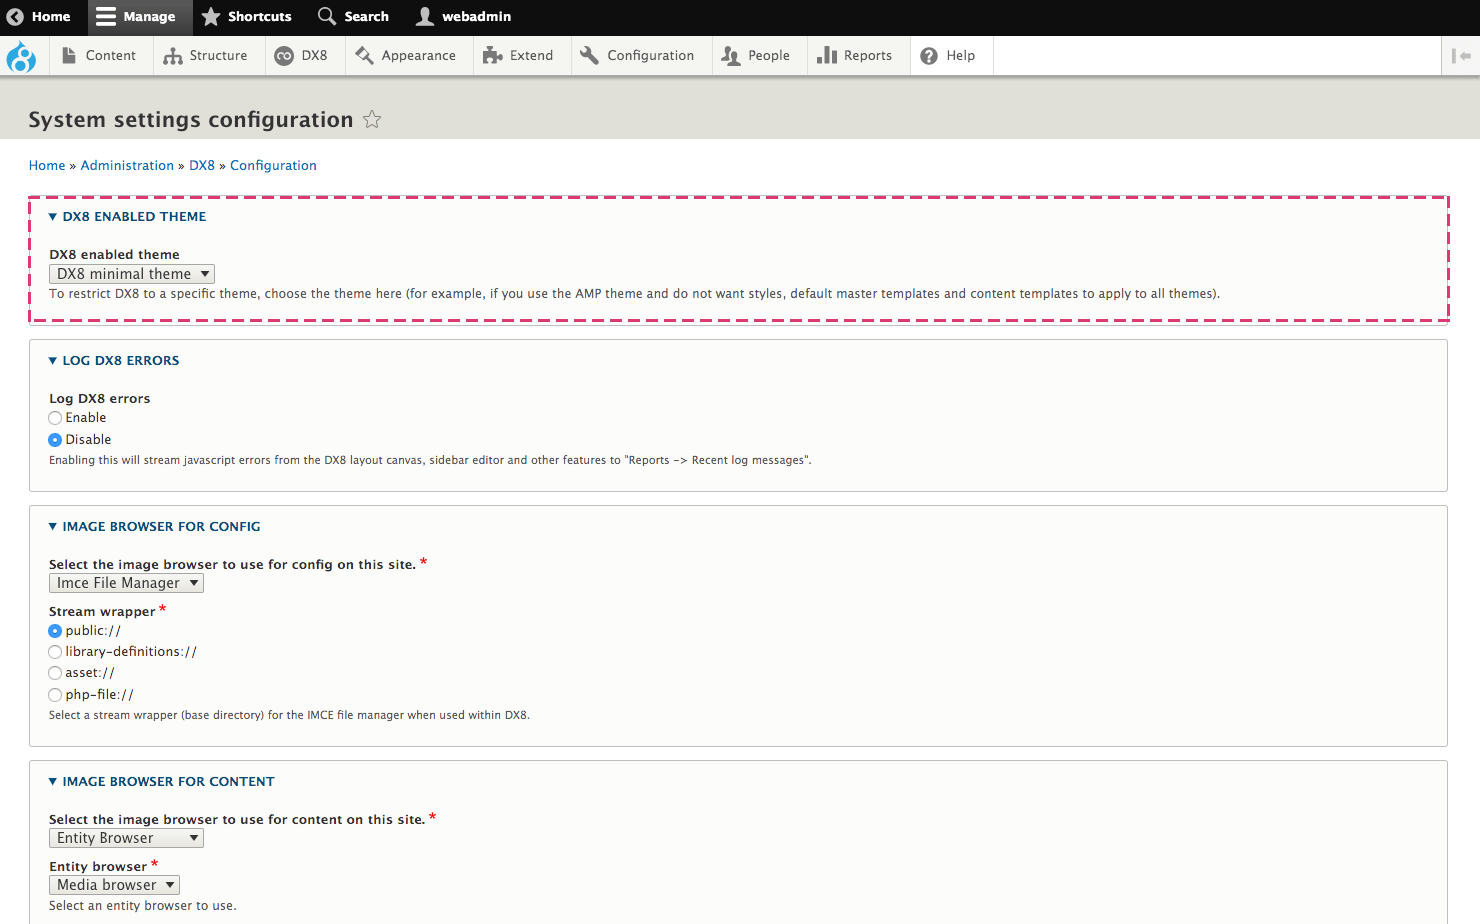
The AMP theme should be developed in the traditional Drupal way, and be a sub-theme of the AMP theme. Your AMP sub-theme should contain all your AMP styling and templates.
Step 3 - Enable AMP view mode
Enable the AMP view mode on your content types you want to configure for AMP:
- Navigate to Manage display of a content type
For exampleStructure>Content types>Basic page>Manage display - Scroll down to
Custom display settingsand open the accordion - Check the
AMPview mode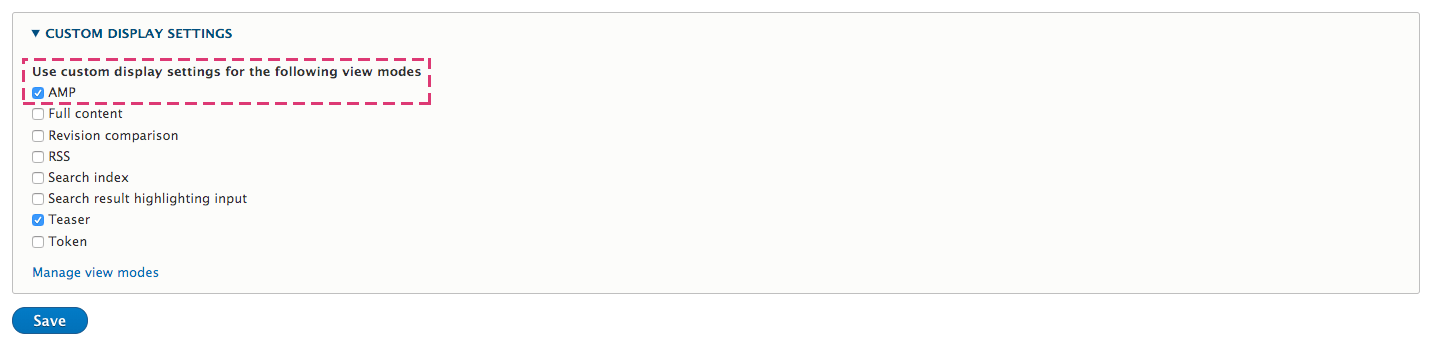
- Click
Save.
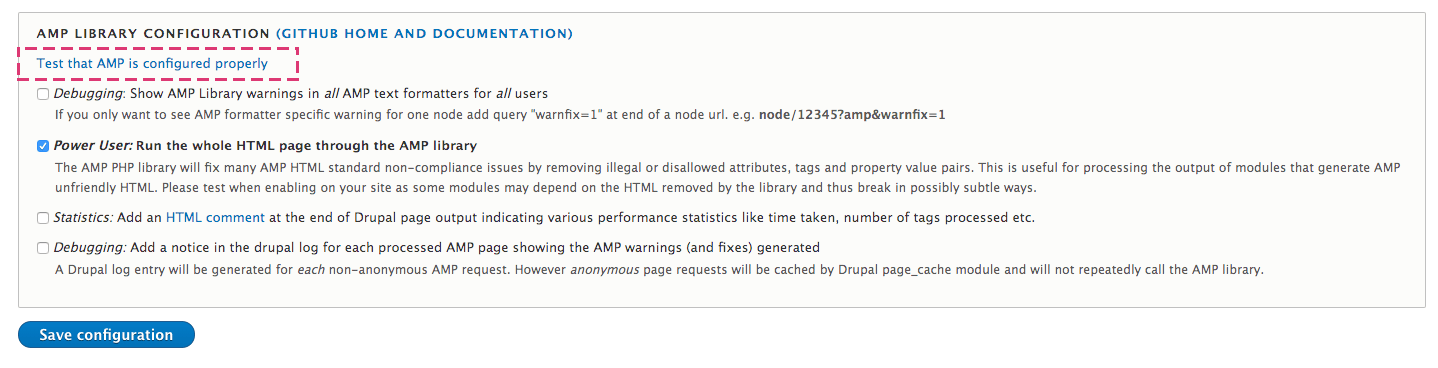
Step 4 - Setup AMP settings
To configure and setup AMP:
- Navigate to
Configuration>Content authoring>AMP configuration - Set your custom AMP theme
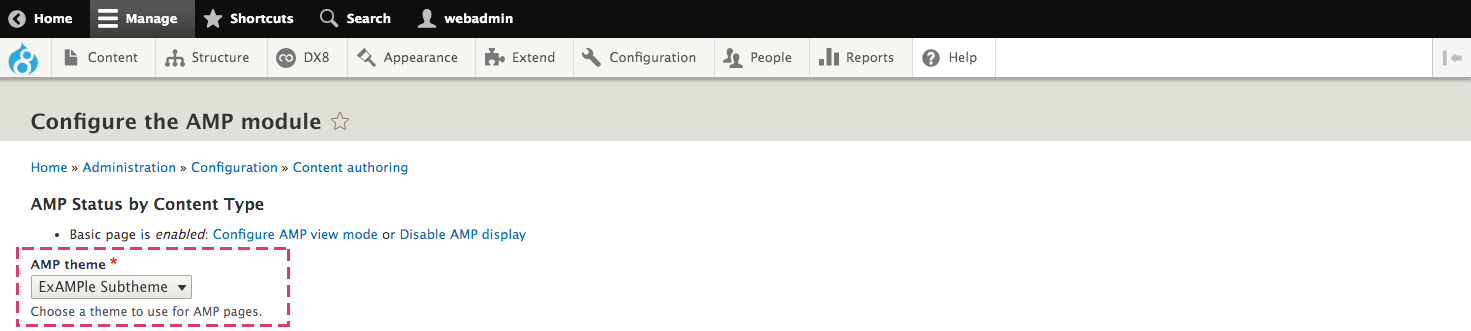
- Set
Power User: Run the whole HTML page through the AMP library
This will run the whole HTML page through the AMP library and convert HTML tags to AMP compliant ones.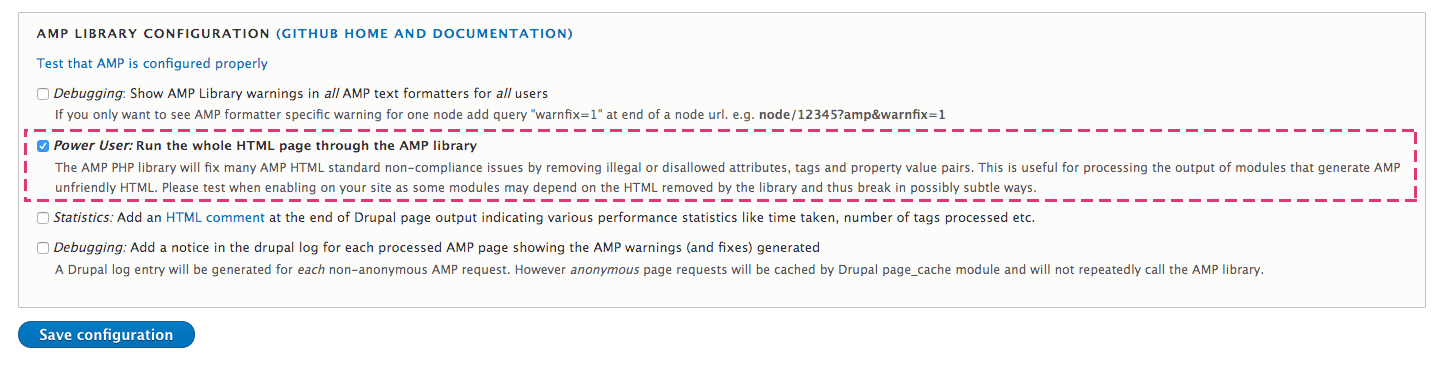
- Click
Save configuration.
Step 5 - Test AMP configuration
On the AMP configuration page click Test that AMP is configured properly.
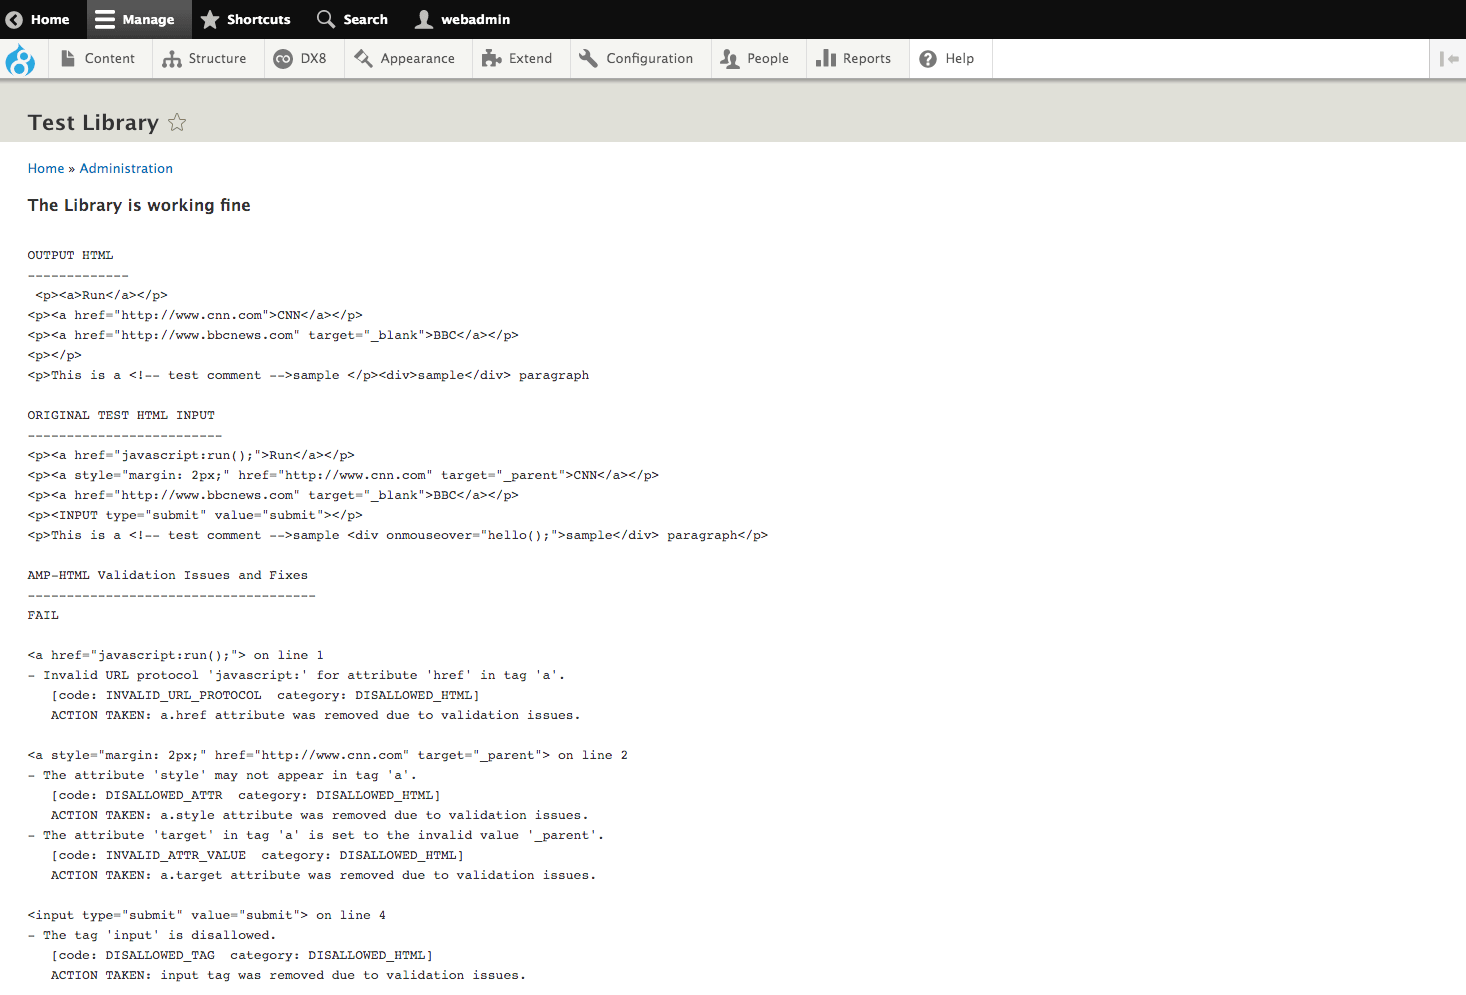
The test page should look like the below:
Navigate to a page and add the following parameters to the URL: ?amp&debug#development=1
For example: http://www.mywebsite.com/about-us?amp&debug#development=1
This will display the AMP version of the page and provide debug information within your browsers console.